Stuck RV Step Repair
[WPXperVideo id=15 ]I’ve got a confession. It’s been about two years since the step on our RV has actually worked properly. In fact it was flaking out a couple years ago and instead of actually fixing it at the time I disconnected it and we just haven’t been using it for the last couple years and I haven’t fixed it either. Well you guys got a bigger step there you go sorry. Broken step. In fact we’ve been using this chunk of wood as ou as our step when we’ve needed a step and I have to admit though that this chunk of wood has been pretty darn reliable because it’s not gonna fail. This kind of lasts forever but today’s the day where I want to actually get this fixed permanently and I wanted to share this with you guys because there’s no need to really go out and buy you know a whole new step assembly here because they’re super expensive and I know that there’s several parts in here that actually can be replaced once you figure out what’s actually wrong with this step and I think I know what’s wrong with mine.
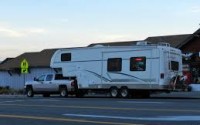
So let’s go ahead and get to it and get this thing done okay. When I first realized that there is an issue with the step I was taking the RV out. It was the day before we were heading out on a trip and I was heading out to go refill my propane and pulling out of our road and I heard this loud crunch crash sound. I’m like oh my god what was that and I am was able to pull off when I got to the top of our road and realized that the step was still out and it had scraped against this embankment and it was all bent out of shape and I’m like aha Mike you know one more thing that I got to worry about the night before we’re getting ready to leave. but I was able to actually you know with a lot of brute force eventually get it kind of bent back into shape. the step wasn’t really broken you know but it was still a little bit bent. it wasn’t a hundred percent but it seemed to be good enough to head out on this trip.
The first day out you know we’re getting ready to leave this Cabela’s parking lot. Alright Tito what’s going on, what happened. it’s not a great start to the trip. Ended up just putting everything back together but disconnecting all the wires and I put a baggie around it and taped it all up and so everything is disconnected and that’s pretty much how it’s set for the next two years. If you were to go out and get a new step assembly all together they’re really expensive they’re like 400 to 600 bucks but if you take a closer look at this you realize that there’s only a few components that you know that actually could fail and all of them are replaceable. Okay so there’s a three main components to this step that we want to pay attention to and the main one here is the control unit.
So this is the basically little brain of the step and the other two are the motor so this is the main motor that drives this gear assembly. Now we’ve got the motor, we got the gear assembly and we got the control unit.Now the control unit is powered through this cable here, this main cable that comes from the RV and there are four connectors in here. I mean sorry there’s four wires that come out of here that go to the the main controller. Now the main red wire is the 12-volt power wire. So that’s always got a 12-volt signal on there and the other three are the switches. So we have our main door; that magnetic switch on the door that when is activated will have 12 volts on there.And the other one is I believe the override switch and the third one is it ignition override switch so when the ignition is on you should get 12 volts on that wire too and I believe that’s the brown one. When it’s powered it’s just a positive and negative this yellow and red one here that go to the motor and that powers the motor when it’s activated to turn on and then it’ll drive this gear assembly which will actually move this bar here with this little arm and cause the step to go in and out and when it’s on to this a black wire coming out of the controller actually goes to power the light and the green wire here is just a ground. It’s grounded here to the to the chassis and this purple wire here is I think is just a switch for the light and it’s not currently used on on my step here and was just never hooked up.
Click here for Kwikee step spares
I guess troubleshooting this step and trying to figure out what the problem was is actually a lot easier than I thought it would be. In fact I located the manual that came with the RV and turns out they have a pretty good step-by-step process for testing the step out and figuring out what’s wrong. Testing, the motor testing the 4-way connector and the override switches and all that stuff and I’ll go ahead and drop a link down below if you want to download this if you don’t have one for your particular step. But yeah super helpful. Now the thing is when I connected everything back up and after a couple years of not using it it seemed like everything was working properly and I figured jeez maybe it’s just okay now. But after just testing it and going through some of these procedures and just kind of opening and closing it repeatedly it eventually stopped working and I’m like okay that’s why it was intermittent before so I even tried you know tapping on it with a wrench on the windings on you know where the motor is and actually it started working again. Well I decided not to leave it to chance and I went ahead and ordered another replacement motor from Amazon and here it is right here. It was about 70 bucks for this particular one and it looks like it’s pretty easy to replace and I’ll also put a link to all the other components for this particular step in the description for you guys in case you need to look that up in order to replace the motor.
You’re going to have to make sure that your step is in the extended position and so if it’s stuck and it won’t come out you’re gonna have to first probably remove the linkage on that arm connected to the gear assembly so that you could manually pull the step out and be able to get to get to the motor assembly before removing the motor. I waNnt to make sure that there’s no power to the step so I want to disconnect that main four wire connector that’s coming from the RV then I want to disconnect the power going to the motor itself and it’s just this plug on the side so you want to remove that as well. Now all this left to do is to remove the three bolts holding the motor down to the gear assembly and I’m going to do that using a ten millimeter socket now. When you’re releasing that last bolt make sure you’re holding on to that motor because it may just drop down. So you want to just take your time removing that last one and the motor itself should just kind of release. If it doesn’t it might be a little stuck and just wiggle it a little bit and it should just come out. Now there’s also probably going to be a gear attached to the other end of it that goes inside the gear box so just be aware of that when you drop that down. So bring it down just kind of directly and don’t twist it because that gear is going to be sitting on the other end.
Now at that point you can just remove the washers and that little gear from the old motor and transfer it over to the new one and I went ahead and cleaned all the grease off of that gear and replaced it with some new grease. I just used some white lithium grease that I had on hand and just gave it a fresh little coat of grease before where I’m going to go ahead and reassemble this. Yeah you can just lift the the motor back into the gear assembly and bolt it back down. Then reconnect the electrical connection to the motor and you want to kind of stay out of the way before you connect the main power on that four-way plug because once it’s powered up the step may actually close. Now once you’re out of the way you can reconnect the power and reconnect that 4-way connector and the steps should probably come back to life. Now I went ahead and just put a zip tie and tidied up the cables there so that it wasn’t just hanging free and everything seemed to be working just fine after everything was put back together. We sure had some good times didn’t we. Oh man it’s a beautiful night. Fire’s getting low!


