Maintaining Your RV Air Conditioner
RV Air Conditioner Maintenance
[WPXperVideo id=9 ] Well I got a beautiful spring day here so I’m gonna go up on top of the roof and do some maintenance to my air conditioner. Clean up the the evaporator and condenser coils and check everything out. I did a video, was a few months back now, where I went up there and I found really dirty evaporator coil and I was gonna do it down south but we did so much boomdocking we’d never even needed the a/c so but I’m gonna get ready for summer here.
So I want the a/c in tip-top condition so got the covers peeled off and we’ll continue on here with the cleaning. Let’s go up top. So here’s the beast, it’s a Coleman Mark 3. I think it’s made by Aircel. I’ll put the model number and stuff in the description but you can see at the back here this is what they call the condenser coil. It’s like a radiator so it gets rid of the heat. There’s a fan behind it and that one’s pretty clean but it has a few spots you can see here they’re very fragile aluminum fins so there’s some spots where there’s that some they’ve been squashed. So I got myself some fin straighteners to take care of that. This was the motor that had seized up on me and it hasn’t reoccurred. The motors good and probably the bearings are good I think what he did is a little bit of rust kind of formed on the shaft there and I think it made a sticky spot. Just by we’re on the coast a lot so we get a lot of corrosion in there. I might try to work some lubricant up in there. I think it’s what they call a sleeveless bearing so there’s no oil poured on it as far as I know.
Looking up the motor online, but some guys say you can kind of get some maybe some oil or kind of wick into there but so far there hasn’t been a problem so I’m not too worried about that. I’ll go through and look for any wasp nest, things, critters that have gotten in there. Luckily enough I don’t see any so hopeful. Then check the fans, inside this styrofoam thing there’s a squirrel cage and I want a flashlight. Looked in there and the fins look nice and clean and everything so I won’t bother getting too far into that. If the fins were really jammed with debris I’d have to take this all apart and clean it but my biggest concern is this they call it the evaporator coils back here and you can see it’s just jammed. I think what happens is we get a lot of dust in the desert that blows up and it’s on here and then when of course, when it’s working, this thing builds up a lot of moisture that wicks off it so kind of almost looks a bit moldy.
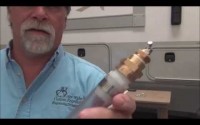
So I want to get that cleaned and I picked up a couple items to do the job, this one’s from new Calgon New Blast this is a condenser coil cleaner. It says no rinse required and this one is evaporator coil cleaner so I bought those off Amazon but I’m probably gonna rinse it. Problem with rinsing it is is like I say these these fins on here made of aluminum are super super fragile so you can easily bend them even with the power of water. Some guys will use a spray bottle but one guy told me to try these bullseye attachments that you can adjust on your hole. It’s got a bull’s-eye and you can get it down to a super fine little stream really light and also on the end of my hose here I have a valve so I should better get the stream down where I can rinse it but not bend anything. I tried a few different fin combs. To try out they were cheap enough such I had a couple different ones see how they work. Straighten up the fins so the main thing I want to do is not get anything down into the RV.
This is where the air comes out of the RV and blows through this evaporator coil that’s what cools the air and then it goes down the other side so this is the main concern. As I’m cleaning this I don’t want a bunch of crap falling into into the viii I’m gonna cover it with some plastic bag material they can see. Here’s the control module with the power and of course I’ve turned all the power off. Big thing. Turn all about so you don’t wreck anything or electrocute yourself up here. Now I’m just gonna pull this plug off here, that can go over the way and then I’ll be able to tuck this the rest of this down here. There’s also this little wire here. It looks like a a temperature pickup, it’s just kind of jammed into the fins there so also put that down below. So I got the wiring out of the way. You know the other big concern is on this side there is some more electrical wiring. This is where the the run capacitor is start capacitor and there’s what the mod and made it put a hard a hard start capacitor on it so I just want to watch I don’t get too much water or anything in there this side. It’s all waterproof because it’s open to the elements so not so worried about that it’s compressor so let’s get to it.
First of all I seal that up. Okay so I got some plastic under there. I kind of disconnected this a bit just like a tip it ever so slightly but you don’t want to do it too hard on that because you got the the piping over here and you definitely don’t want to break that or you’ll ruin your air conditioner. And I jammed one of the metal covers behind there to block anything from going down into the output side so I think it should be okay. Also put a big tub underneath on the floor inside the rig just in case any gunk came in there but I think I should be okay. So I’m gonna spray that down and let her sit awhile and I can rinse it off. What happens with this is there’s always condensation coming off of this one, it’s running and just below, I don’t know if you can see it. It’s tough to see but there’s a drain hole right in on each side of it, a little blurry down in there there’s the drain holes and what happens is it builds up water in the pan and drains onto the roof and that’s what runs off the back of your rig when you’re running the AC. It’s one reason I put that you can see tape there. That has a little piece of rope underneath it and it just made a little gutter because they used to go and pool in the corner all the time would make a real mess of the back so this way it just dribbles down there and runs down that gutter and then out the main gutter.
Okay let’s get to it. Sorry about the shadow but early morning here. I wanted to get on this. This one smells nice and citrusy. I’ll give it a good soak and let it sit for five or ten minutes there then we’ll give her a little rinse. Might have to do it again, coils are really dirty. Okay so it’s sort of done its job. We’re gonna give it a rinse so you can see this bullet really works really good. Get a really super fine spray and not too much pressure to hurt the coils. I can do a really good job get right in there between the coils and really clean them up but not worry about bending them. So that was a good tip to get one of these. So I’m having pretty good success straight doing the fins. Once I found the right size it seems like about 16 per scoop per inch is working really well getting rid of the biggest ones so it’s just a matter of patience but both work pretty good. This one works pretty good same as this one so I’d say either one. I don’t like this one. I found this. This 16 inch comb worked really well on both the the evaporator and compressor so I’ll slowly try to work out all the kinks.
Okay I’ve used the whole can. Looks quite a bit better. A little bit of a dirt here and there but I’m pretty happy with that should do a good job. Also in the back here I made sure to really flush it out back there cuz all the dirt and debris lands down in that pan at the bottom so everything you wash down lands out and then it can plug your drain hole so make sure to wash all that dirt and crap out of there so it’s a nice clean pan down there and I made sure the drain holes are are cleaned out so you don’t get plugged. So I’m going to put all this back together I didn’t get much water down below at all so that worked well and once I see all this area up I can go in to clean the back condenser there. Some guys showed up to do some some cement work over there if you wondering what all that noise about nice day in Victoria BC really lush city lots and lots of trees.
OK let’s get back to work. So the evaporator coil cleaner was very green friendly biodegradable and everything but the condenser coils got quite a bit of warnings about you know don’t get it on your skin and stuff like that, don’t get it in your eyes ,don’t leave it on materials, may damage plastic, so I’m gonna make sure they’re really be careful and then hose all that stuff. Get it off my rubber roof material for sure and then wash the rinse the sides of the RV where it goes down. Never know what’s going to do so just a warning about that make sure you read all the the warnings on the label. They even say the vapor is harmful so luckily I’m outside with a good breeze so hopefully this isn’t the last video you see.
Let’s give everything a really thorough rinse, get rid of that stuff. Wasn’t too dirty on the outside fan anyway and I’ll get my roof a really good wash off. It’s just about time for a full RV wash so tomorrow I’m gonna do the roof. Supposed to be quite warm and wash the rig, getting ready for it’s summer wax. Okay there we go last thing I’m gonna do is just take some silicone lube. Try to get some in that bearing just spraying it you can see where it’s kind of removed some of the rust that was right at the entrance there and that was all rusty so I’m gonna just spray a bunch in there and hopefully that’ll clear up that berry and help it out to sunlight. There we go BAM, seems to be running pretty smooth so there’s sew this top part up and then I’ll go inside to finish up a few odds and ends on the inside and then we’ll be done. So what do I want to do on the inside? You can see the aluminum tape, they’re ducting tapes. Sort of come and loosen spots, you can get rid of some of the old stuff and replace it with new stuff just to get a better seal everywhere. So it just comes in the big rolls too sticky back off and you can stick it in there. I’ll just go in there and do the best I can to get everything really sealed.
Okay looks a little better. That’s up there, that squirrel cage fan we were talking about, on the roof and they can get dust inside it and debris so it’s that’s why I checked it up there. there’s a little bit of dust. I think I might be able to get some compressed air up there. I think once I get my air compressor working, I’m getting a good air compressor hose blower attachment for it so I’ll give that a good blowout. Once I get that working there’s between this and the roof there’s a big rubber gasket that goes around on the roof and that’s what keeps everything from leaking so it’s a good idea if you have this apart is to check all the wood all the way around and the ceiling you know look for soft spots or discoloration because that gasket if it leaks it’s gonna come in here and cause damage. Mine looks pretty good, I’m not gonna mess with it or change it or anything. There’s four bolts right here. See these long bolts and those, you tighten those and that compresses the gasket you don’t want to over compress it but sometimes the rigs they can it can work loose, you know, with all the rattling from the road and stuff so I know a while back I tightened mine up they’re getting a little loose so you might want to check those. Make sure none of those are coming loose so getting there, we’re getting there. One last thing to do and then we’ll give her a test on this if there’s a… from the outside you can get at this little sponge AC filter so I’m gonna take that out and give it a wash in the sink get rid of some of this debris that’s on it it’s not too bad right now but sometimes it can get quite messed up and then will sow her up and will give a temperature test to see if it’s working good,
Okay let’s give it a temperature test. Turn that down nice and quiet check out one of the outlets here. So up here we got what 74 degrees right now and the air come you know 50 yes that’s a good temperature differential so I think this air conditioner in this safe to get around the 20 degrees differential you’re doing pretty good. Well that’s nice to have that all in tip-top shape for the summer just a few notes here at the end are these two, the condenser coil cleaner I really didn’t like. It’s like I said it was harsh also the can run out and ran out in no time it didn’t seem to do do a great job but the evaporator form that lasted quite a while and and did a pretty good job so I think I would just buy a couple cans of this and use it on the the condenser as well as the evaporator. The bullseye nozzle was a really good idea because you could just you could just turn that down to a really fine spray for rinsing and really came in handy Out of the two fin combs, the two different ones I think I like these ones best you could take it off the ring and I just found a number I think is number 16 15 and 16 worked really well it’s straightening the fins compared to this one this one worked good to actually work better off than used it a little handle so I hope you enjoyed that little video.
Condenser coil cleaner on Amazon
Evaporator coil cleaner on Amazon
Bullseye nozzles on Amazon


