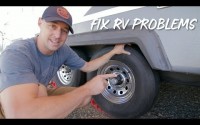
Do it Yourself RV Repairs and Maintenance
DIY RV Repairs
[WPXperVideo id=7 ]
The New RV Camping Season,
We’re just starting a new year and getting ready for our next camping season. we have a few small repairs to take care of on Willow to get her shipshape and ready to go. I think most anybody who has been involved in our being in one way, shape or form knows that there is always a little bit of maintenance to do in an RV no matter how hard you try. No matter how much preventive maintenance you try to do it just seems like things pop up.I guess that’s all part of the fact that you’re basically you know driving your house down the road and you know it’s almost like an earthquake that goes on in the back and things are going to either loosen up or or break. So we are going to do a few RV repairs today.
One of them is we had a, I think it’s a co2 sensor, an LPG gas sensor that decided to stop working. Not sure why but you know all these things are covered under warranty. If you’re willing to do the work yourself, which I don’t mind, I’d like to know how to do it. So YouTube is a great resource to be able to pull up. People that have gone through the same problem and done a a repair like in this case. It’s really just two wires to hook up the new one but it’s important. you know it’s important, to be able to do this stuff on your own or the maintenance cost can get pretty high over time.
LPG Sensor Repair
So the first thing I’m going to do is this sensor and then I have a the electric steps. For whatever reason the motor decided it didn’t want to work anymore. So we’re going to go ahead and change out that motor and then I have some batteries to replace. Which is just kind of normal maintenance on the tire pressure sensors and reset the tire pressure sensor unit so that we get accurate readings. So that’s pretty much what I have on tap today.
Okay this is our new unit here and again it’s a safety alert. I guess these things you know it’s not very common for them to go out. So I’m not really sure why ours did but I have a new unit here and essentially it’s just a couple of wires. So nothing really complicated on this install. I’m just going to grab a couple of tools and we’ll get it put in alright. Most jobs and RV repairs can be done with just a small tool kit. We just carry this little multi-tool kit here which does pretty much everything for us. Anything, like I said in the past, anything that gets to be too involved you might consider having a shop do. Because it may require tools that are very costly and way too heavy to carry around in an RV.
Bedroom Unit
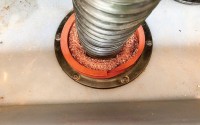
Alright the unit that I’m going to replace is back here in the bedroom. And it’s down right above the generator which makes sense. Because not only does it give you an LP gas sensor but it also gives you a co2 which you know that gasoline engines emit co2 and too much could be very harmful. So we’re going to make sure this sensor is working. It’s very very important, it’s not something you want to have not working in your RV. Especially when you’re boondocking. You run your generator through the night, you definitely want to know that you have an alarm. Just in case you have a buildup of these toxic gases inside your coach.
Where I’m at right now is just below the drawers in the bedroom. You can see the unit is just housed right here below the drawers. At its lowest point to the floor and closest to the generator. You might even hear a little bit of the generator running because it’s a little cold today. So I got it running. Alright I’ve gone ahead and pulled off the old unit. I have clipped the first wire. Capped off the wire that attaches to just to be safe so nothing arcs. And I’m gonna go ahead and do the same on the opposite side and then I’ll go on ahead and splice the new one in and we should be ready to roll. Hook it up and see if it will come on.
The Old Unit
Alright there’s the old unit. Again don’t know what happened to it but it just started giving me a non-functional alarm and I couldn’t couldn’t get it to work anymore. So I go ahead and switch it out. Strip our wires. I’ve got to do this side as well, Alright put the two together, put the cap on. Look at that, easy-peasy. Second wire get that piece hooked up and then as you can see hit the test button make sure its operational. Light turns green. We’re good to go now, we have an operational unit. Ready to take on the next project.
RV Electric Step Repair
OK the next step is I’m going to fix our electric step and again I said that the motor just stopped working. Not sure why. I’ve tried many things to see if I can get it going again. It’s just not so I’m guessing it’s a faulty motor so I have purchased a motor. It’s a quickie step and the motor is really. it’s only three volts. not very complicated to put in but you have to get up underneath the coach to do it so let me show you what the motor looks like.
There you go pretty simple motor. You have to attach the gear onto here which just slides right on and then again it’s just three bolts and a plug in for the electric so we’ll try to get this in, see if we get our steps operational again. As you can see our steps are kind of half in and half out so to speak and when I open the door nothing happens so I’m going to get up underneath here and I’ll show you where the motor is located.
Where to Find the Motor
Alright so there’s our motor right here and here are the bolts I have to take out in order to actually access that I’m going to have to go ahead and disengage this pin over here, maybe you can see it. So the steps will come down and it’ll give me room to work on it and replace the motor. Step number one, get this pin taken care of. Okay so there’s a small cotter pin that goes through there and it just slides through just like that. Remove it and the steps will come down which exposes our motor to be able to pull it off. Not very easy to do one-handed and holding the camera but I’ll make it work somehow. There we go.
OK I’ve replaced the motor, hooked up the power, opened the door and the motor does run so it definitely was a bad motor. Now I’m just tightening everything back up. I’ve got to replace our pin and you see this piece here has to go into here and the pin goes through it and I replace the cotter pin. Okay I got the motor installed and let’s give it a try. Here we go. Perfect.
DIY RV Repairs Save Money
So if you’re thinking about getting into RVing it’s always a good idea to be kind of handy, know your way around tools because a lot of the things are really just small projects and easy to do but can be very costly if you have to take your motor home in to have these projects taken care of, or these RV repairs taken care of, so make it a point to try to learn as much as you can about your your RV and hopefully if any additional RV repairs arise that are similar to ones that happen in the past you’ll be able to take care of it right away and without any problems. Thank you so much for watching.
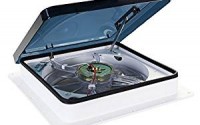
How To Install A Fan-Tastic Vent
MotorHome Quick Tip: Mouseproofing